Experience Luxury at Home: Perfect Crème Brûlée for Any Occasion
There’s a reason crème brûlée remains a timeless classic on dessert menus worldwide. Its seductive combination of a rich, creamy vanilla custard base topped with a shatteringly crisp, caramelized sugar crust is nothing short of culinary magic. Many might assume this elegant dessert is reserved for fancy restaurants or the hands of professional pastry chefs. However, we're here to reveal a delightful secret: creating a truly spectacular homemade crème brûlée is not only achievable but surprisingly straightforward. Imagine cracking into that golden-brown sugar shell with a spoon, revealing the velvety smooth custard beneath – a truly luxurious experience you can bring right into your own kitchen for any celebration, big or small.
The Allure of Crème Brûlée: A Culinary Masterpiece Made Simple
Crème brûlée, French for "burnt cream," is a symphony of textures and flavors. The initial crack of the caramel, followed by the luscious, melt-in-your-mouth custard, creates a dessert experience unlike any other. It’s a treat that speaks of sophistication, yet its core components are incredibly humble and accessible. For those embarking on their baking journey, the sheer elegance of this dessert often places it on a "baking bucket list." The good news? That list item is far easier to conquer than you might think. This dessert doesn’t demand a culinary degree; it simply requires attention to detail and a love for truly exquisite flavors.
What makes homemade crème brûlée so special? Beyond the inherent satisfaction of crafting something beautiful, it’s the ability to customize and perfect it to your taste. Whether it’s an intimate Valentine’s Day dinner, a celebratory Mother’s Day brunch, a special anniversary, or simply an evening when you crave something extraordinary, crème brûlée elevates the moment. You don't need to dine out to enjoy this delicacy; with just a handful of ingredients and some fundamental techniques, you can achieve restaurant-quality results that will impress every guest – or simply delight yourself. If you're intrigued by how few ingredients can yield such a magnificent result, you might find our guide,
Shockingly Simple Crème Brûlée: Your 6-Ingredient Guide, particularly helpful.
Gather Your Ingredients: The Foundation of Perfect Crème Brûlée
The beauty of crème brûlée lies in its simplicity, requiring a surprisingly short list of high-quality ingredients to achieve its signature rich flavor and creamy texture. Focusing on fresh, excellent components is key to unlocking its full potential.
Here’s what you’ll need for approximately 6-8 servings:
*
Dairy: 3 cups heavy cream. This is the bedrock of your custard, providing unparalleled richness. Don't substitute with half-and-half or milk; the fat content of heavy cream is essential for that luxurious mouthfeel.
*
Eggs: 1 extra-large whole egg and 4 extra-large egg yolks. Some recipes swear by 5 egg yolks to 3 cups of cream for an exceptionally lush and creamy custard, and this ratio is highly recommended for ultimate decadence. The yolks are crucial for thickening and enriching the custard, giving it its characteristic silky texture.
*
Sweetener: 1/2 cup granulated sugar, plus approximately 1 tablespoon per serving for the caramelized topping.
*
Flavorings:
* 1 teaspoon pure vanilla extract. Use good quality vanilla for the best flavor; it truly shines through.
* 1 tablespoon orange liqueur, such as Grand Marnier. This addition provides a subtle, sophisticated citrus note that beautifully complements the rich cream and vanilla. It’s optional but highly recommended for an extra layer of complexity.
* *Optional but highly recommended:* A pinch of salt. A tiny amount of salt helps to balance the sweetness and enhance the overall flavor profile of the custard.
* *Optional Flavor Boost:* A small amount of espresso powder. For those who love a deeper, more complex flavor profile, a touch of espresso powder can make a profound difference, deepening the vanilla and cream without making the custard taste like coffee. You can typically find it in the coffee aisle of most grocery stores.
Remember, while the list is short, the quality of each ingredient contributes significantly to the final masterpiece.
Mastering the Method: Step-by-Step to Silky Perfection
Creating your perfect crème brûlée involves a few key steps, each contributing to that impossibly smooth custard and firm set.
1.
Preheat & Prepare: Begin by preheating your oven to 300°F (150°C). Arrange 6-8 six-to-eight-ounce ramekins in a deep baking pan. This setup is crucial for the water bath, which ensures even, gentle cooking.
2.
Whip the Eggs: In the bowl of an electric mixer fitted with the paddle attachment (or a large bowl with a whisk), combine the whole egg, egg yolks, and 1/2 cup of sugar. Mix on low speed until they are just combined and pale yellow. Be careful not to incorporate too much air, as this can lead to a foamy texture in your finished custard.
3.
Scald the Cream: Pour the heavy cream (and the pinch of salt, if using) into a small saucepan. Heat it over medium heat until it's very hot to the touch and just barely simmering around the edges – *do not boil*. Scalding helps to fully infuse the vanilla and other flavors, and prepares it for tempering.
4.
Temper the Eggs: This is a critical step to prevent your eggs from scrambling. With the mixer on low speed, slowly and gradually drizzle about half of the hot cream into the egg mixture while continuously whisking. This slowly brings the temperature of the eggs up without cooking them too quickly. Once tempered, slowly add the remaining hot cream to the egg mixture, ensuring everything is well combined.
5.
Infuse & Strain: Stir in the pure vanilla extract and orange liqueur (and espresso powder, if using). To ensure an incredibly silky smooth custard, strain the mixture through a fine-mesh sieve into a large measuring cup or pitcher. This removes any potential cooked egg bits or unmixed sugar granules.
6.
Fill the Ramekins: Carefully pour the strained custard mixture into your prepared ramekins, filling them almost to the top.
7.
The Water Bath (Bain-Marie): Place the baking pan with the filled ramekins into the oven. Then, very carefully pour boiling water into the baking pan, ensuring it comes halfway up the sides of the ramekins. The water bath creates a gentle, moist, and even cooking environment, which is essential for a smooth, creamy custard that won't curdle or crack.
8.
Bake to Perfection: Bake for 35 to 40 minutes, or until the custards are set around the edges but still have a slight "jiggle" in the center when gently shaken. Overbaking can lead to a tough or rubbery texture.
9.
Cool & Chill: Carefully remove the ramekins from the water bath and let them cool completely to room temperature on a wire rack. Once cool, cover each ramekin with plastic wrap and refrigerate for at least 4 hours, or ideally, overnight. Chilling allows the custard to fully set and develop its rich flavor, making crème brûlée an excellent make-ahead dessert.
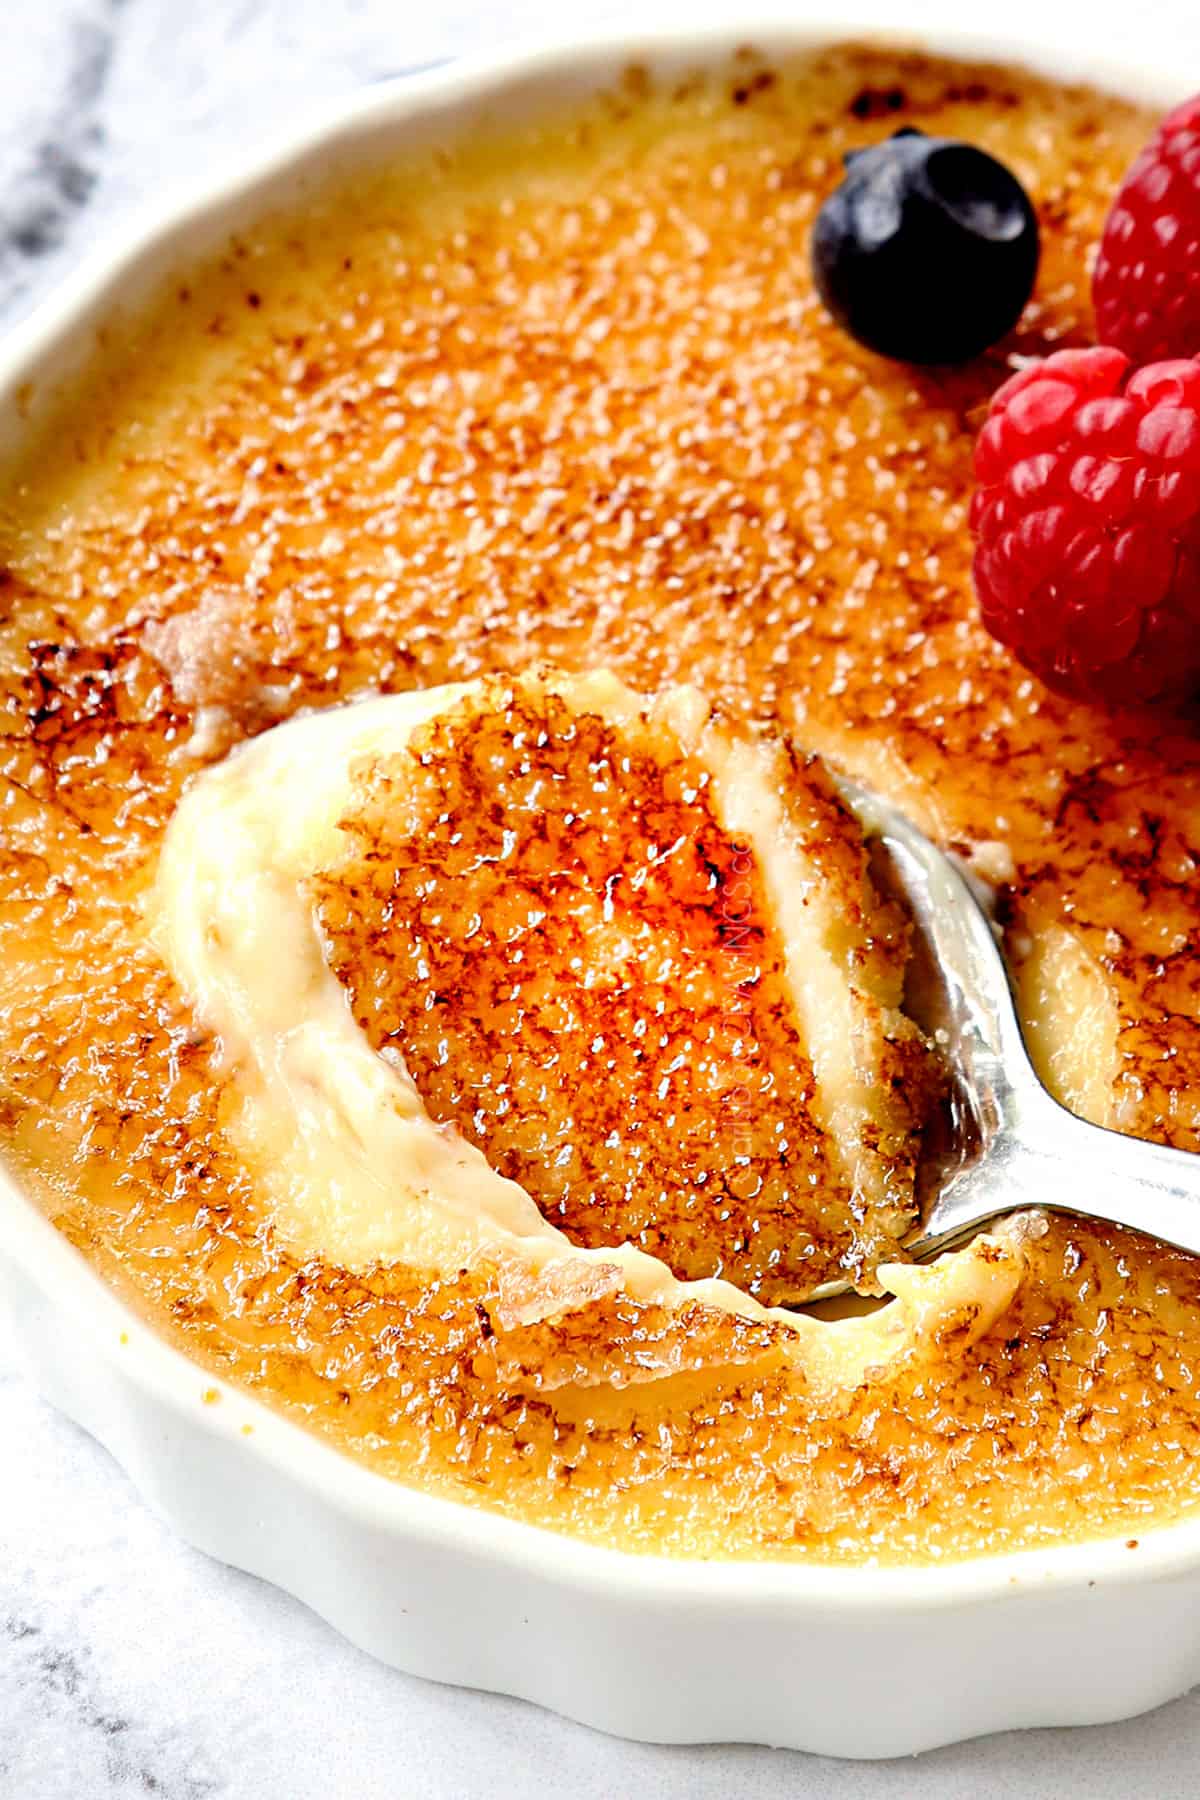
The Grand Finale: Torching Your Way to Irresistible Crunch
The defining characteristic of crème brûlée is, without a doubt, its signature caramelized sugar topping. This final flourish is where the "brûlée" comes into play, transforming simple sugar into a glistening, brittle crust that provides the perfect textural contrast to the smooth custard below.
1.
Prepare for Torch: When you're ready to serve, remove the chilled custards from the refrigerator. Blot any condensation from the top of the custard with a paper towel.
2.
Sugar Application: Sprinkle approximately 1 tablespoon of granulated sugar evenly over the top of each chilled custard. Ensure an even layer for consistent caramelization.
3.
The Torch Technique: Using a kitchen blowtorch (this is truly the best tool for the job, as it allows precise control and prevents heating the custard below), move the flame steadily over the sugar in a circular motion. Watch closely as the sugar melts, bubbles, and transforms into a beautiful amber crust. Be patient, move the torch evenly, and avoid holding the flame in one spot for too long to prevent burning. If you're intrigued by the tools and techniques for achieving this perfect crust, our article
Secrets to Velvety Crème Brûlée: The Perfect Custard & Torch offers even more insights.
4.
Set and Serve: Once caramelized to your liking, allow the ramekins to sit at room temperature for a minute or two. This brief resting period allows the caramelized sugar to cool and harden into that irresistible brittle shell.
5.
Enjoy! Serve immediately and revel in the delightful crack and creamy richness.
While a kitchen torch is ideal, if you don't have one, you can place the sugared ramekins under a broiler. Position them about 4-6 inches from the heat source and watch *very* carefully, as sugar can burn quickly. Broil for just 1-3 minutes until the sugar melts and caramelizes.
Making crème brûlée at home is an incredibly rewarding experience. From the careful tempering of the eggs to the satisfying crack of the caramelized sugar, each step builds anticipation for a truly luxurious dessert. It’s a testament to how simple ingredients, handled with care, can create an extraordinary culinary delight. So, next time you're planning a special meal or simply want to treat yourself to something decadent, don't hesitate to whisk up a batch of this magnificent custard. You'll be amazed at how easily you can bring this touch of gourmet luxury into your own home.