Secrets to Velvety Crème Brûlée: The Perfect Custard & Torch
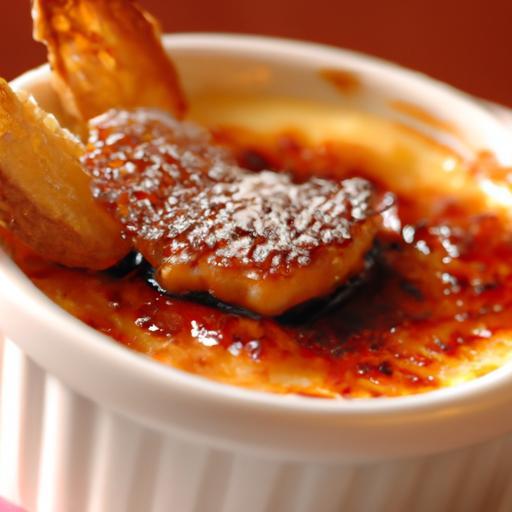
Imagine the satisfying *crack* as your spoon breaks through a shimmering, caramelized sugar crust, revealing a lusciously smooth, creamy custard beneath. This isn't just a dream found on a fancy restaurant menu; it's the sublime experience of perfectly crafted crème brûlée, and it's surprisingly within reach in your own kitchen. Often perceived as an intimidating dessert, crème brûlée is, in fact, remarkably straightforward to master, requiring just a handful of staple ingredients and a few key techniques. This comprehensive guide will unlock the secrets to achieving that velvety custard and dazzling caramelized topping, transforming you into a crème brûlée connoisseur.
The Allure of Crème Brûlée: Why This Dessert Reigns Supreme
Crème brûlée stands apart in the dessert world, not just for its elegant presentation but for the exquisite interplay of textures and flavors. The contrast between the brittle, almost glass-like sugar shell and the rich, cool, silken custard is what defines this classic French delicacy. It's a symphony for the senses, delivering a moment of pure, unadulterated indulgence with every spoonful.
Many aspiring bakers place crème brûlée high on their "baking bucket list," and for good reason. It embodies luxury and sophistication. What few realize is that this restaurant-quality dessert is incredibly approachable for the home cook. Whether you're planning a romantic Valentine's Day dinner, celebrating Mother's Day, an anniversary, or simply want to elevate an ordinary evening, making crème brûlée at home adds an undeniable touch of class. Forget expensive dining; the best crème brûlée experience can be yours, right in your own kitchen. For more ideas on how to bring gourmet experiences home, check out our guide on
Experience Luxury at Home: Perfect Crème Brûlée for Any Occasion.
Crafting the Silky-Smooth Custard: Ingredients & Technique
The heart of any exceptional crème brûlée lies in its custard. Achieving that signature silky-smooth texture requires careful attention to ingredients and a few fundamental techniques.
The Essential Ingredients
You'll be surprised at how few ingredients are needed to create such a spectacular dessert. The magic truly comes from their quality and preparation.
*
Heavy Cream: This is the foundation of richness. Don't skimp on this; it's what gives crème brûlée its luxurious mouthfeel. Three cups of heavy cream is the ideal quantity for a batch.
*
Eggs: The precise ratio of eggs is crucial for achieving the perfect set without being rubbery. We recommend one extra-large whole egg combined with four extra-large egg yolks. This yolk-heavy blend ensures unparalleled creaminess. Remember, you'll have leftover egg whites, which can be saved for other recipes like meringues or soufflés.
*
Sugar: You'll need sugar for two distinct purposes. Half a cup for sweetening the custard, and an additional tablespoon per serving for the iconic caramelized topping.
*
Pure Vanilla Extract: Use only pure vanilla extract. Its warm, aromatic notes are indispensable to the classic crème brûlée flavor. A teaspoon makes all the difference.
*
Orange Liqueur (Optional, but Recommended): A tablespoon of Grand Marnier or a similar orange liqueur adds a subtle, sophisticated depth that complements the vanilla beautifully without overpowering it.
*
Espresso Powder (Optional, but Transformative): For those looking to elevate their crème brûlée, a touch of espresso powder, found in the coffee aisle, makes a profound difference. It doesn't make the dessert taste like coffee, but rather deepens and enhances the vanilla and cream flavors, adding an unexpected layer of complexity. Trust us, it makes a good crème brûlée the *best* crème brûlée.
*
Pinch of Salt: A tiny bit of salt balances the sweetness and brings out the other flavors.
For a simplified guide, you might also find
Shockingly Simple Crème Brûlée: Your 6-Ingredient Guide helpful.
Step-by-Step Custard Creation
1.
Prepare Your Oven: Preheat your oven to 300°F (150°C). This low, steady temperature is key for gentle baking.
2.
Mix Eggs and Sugar: In the bowl of an electric mixer (fitted with a paddle attachment or using a hand mixer), combine the extra-large egg, four extra-large egg yolks, and 1/2 cup of sugar. Mix on low speed *just* until combined. The goal here is to blend, not to whip air into the mixture, which can lead to a foamy custard.
3.
Scald the Cream: In a small saucepan, gently heat the heavy cream with a pinch of salt until it's very hot to the touch but not boiling. You'll see tiny bubbles forming around the edges. This step helps dissolve the sugar, infuses flavors, and prepares the cream for tempering.
4.
Temper the Eggs: This is a critical step to prevent scrambling the eggs. With your mixer still on low speed, slowly, in a thin stream, pour the hot cream into the egg mixture. This gradual addition brings the temperature of the eggs up without cooking them.
5.
Add Flavorings: Once the cream is fully incorporated, stir in the pure vanilla extract and the orange liqueur (if using). If you're adding espresso powder, whisk it in now.
6.
Strain for Smoothness: For the absolute smoothest custard, pour the mixture through a fine-mesh sieve into a clean bowl or large measuring cup. This removes any potential bits of cooked egg or chalazae, ensuring a perfectly velvety texture.
7.
Fill Ramekins: Carefully pour the custard into 6 to 8-ounce ramekins until they are almost full.
The Perfect Bake: Water Bath Wisdom & Setting Success
The baking process for crème brûlée is as delicate as the dessert itself. A crucial technique ensures even cooking and that signature creamy texture: the water bath.
Why a Water Bath is Non-Negotiable
Placing your ramekins in a larger baking pan and surrounding them with hot water (a "bain-marie" or water bath) is essential for several reasons:
*
Gentle, Even Heat: Direct oven heat can be too harsh for custards, causing the edges to overcook and become rubbery while the center remains raw. The water bath acts as a buffer, creating a moist, gentle cooking environment that ensures the custard sets evenly from edge to center.
*
Prevents Curdling: The steady temperature of the water bath prevents the eggs from curdling or separating, resulting in a perfectly smooth and cohesive custard.
*
Insulation: It insulates the ramekins, preventing the bottoms from burning.
Once your filled ramekins are in the baking pan, carefully pour boiling water into the pan until it comes halfway up the sides of the ramekins. Be mindful not to splash water into the custard itself.
Baking & Cooling Protocol
1.
Bake: Bake the custards in the preheated 300°F (150°C) oven for 35 to 40 minutes.
2.
Check for Doneness: To test for doneness, gently shake one of the ramekins. The custard should be mostly set around the edges but still have a slight, delicate jiggle in the very center. It will continue to set as it cools. Overbaking will result in a grainy or rubbery texture.
3.
Cool: Carefully remove the ramekins from the water bath (using tongs can be helpful) and let them cool completely to room temperature.
4.
Refrigerate: This step is paramount. Once at room temperature, transfer the custards to the refrigerator and chill them for at least 4 hours, or ideally, overnight. This prolonged chilling time allows the custard to fully firm up and develop its ultimate creamy consistency. Making them ahead of time makes crème brûlée an awesome make-ahead dessert, perfect for entertaining!
The Grand Finale: Torching Your Crème Brûlée to Perfection
The moment of truth for crème brûlée is, without a doubt, the caramelization of its sugar topping. This dramatic flourish transforms a simple custard into an iconic dessert.
Sugar Application
When you're ready to serve, take your chilled custards out of the refrigerator. Spread a thin, even layer of about 1 tablespoon of granulated sugar evenly across the top of each crème brûlée. The key here is *evenness*; an uneven layer will result in patchy caramelization.
The Art of the Torch
While some recipes suggest using a broiler, a kitchen blowtorch is truly the preferred method for achieving that perfect, crisp sugar crust. It gives you precise control over the caramelization process, ensuring an even, beautiful golden-brown topping without heating the custard underneath.
1.
Torch Technique: Hold the blowtorch a few inches above the sugar, moving it in a continuous, even circular motion. Watch closely as the sugar melts, bubbles, and then turns a rich amber color. Avoid holding the torch in one spot for too long, as this can lead to burning.
2.
Achieving Perfection: Continue torching until the entire surface is uniformly caramelized. You're looking for a deep golden-brown, not black.
3.
Rest and Harden: Once caramelized, allow the crème brûlée to sit at room temperature for just a minute or two. This brief resting period is crucial for the molten sugar to cool and harden into that irresistible, brittle crust.
Beyond the Basics: Flavor Variations & Make-Ahead Magic
While classic vanilla crème brûlée is timeless, don't hesitate to experiment with flavor variations to suit your palate or occasion.
Creative Custard Infusions
*
Citrus Zest: Infuse the heavy cream with lemon, orange, or grapefruit zest during the scalding process for a bright, aromatic twist.
*
Spices: Add cinnamon sticks, cardamom pods, or a star anise to the cream as it heats for a warmly spiced custard. Remember to strain them out before tempering.
*
Other Liqueurs: Experiment with a tablespoon of Amaretto for an almond note, Kahlúa for a coffee kick, or even rum for a Caribbean flair.
*
Chocolate: Gently melt a few ounces of good quality chocolate into the hot cream for a rich chocolate crème brûlée.
The Ultimate Make-Ahead Dessert
One of the greatest advantages of crème brûlée is its make-ahead potential. The custards can be baked and chilled for up to three days in the refrigerator *before* torching. This makes it an ideal dessert for entertaining, as you can do all the prep work in advance. When guests arrive, simply pull out your chilled custards, sprinkle with sugar, and perform the dramatic torching tableside – it's always a showstopper!
Conclusion
Making perfect crème brûlée is not about innate baking talent, but about understanding a few simple principles and executing them with care. From the gentle tempering of the eggs to the protective embrace of the water bath and the final fiery kiss of the torch, each step contributes to a dessert that is both elegant and profoundly satisfying. With this guide, you now possess the secrets to creating a velvety, restaurant-quality crème brûlée in your own home. So gather your ingredients, fire up that torch, and prepare to impress yourself and everyone lucky enough to share in this delightful culinary experience. The perfect crack awaits!